Every QR code you can put up, and where each one goes
A tag inside each tenant’s door for repair requests, a sign at the building door for vendors, and a tag on the equipment that keeps its own history. Here is what each code does, where to put it and how to print it.
A technician, a service company or a facilities team? See the guide written for you →
Live codes: the sticker stays put, the page stays current
Most codes here are live. The sticker holds a link, not the data, and scanning it opens a web page that always shows the latest, so a tag you put up this year still shows next year’s repairs without being reprinted.
Anyone can scan one with an ordinary phone camera. Your tenants, your plumber and a technician you have never met need no app and no account.
- Tenant repair requests come in through the door tags.
- Vendors sign in and out at the door sign, and you get an email or a text.
- Service history builds itself: a contractor logs the work they did from the equipment tag, and you accept it.
- You can replace a tenant’s tag at any time, and the old one stops working straight away.
Tenant door tags: repair requests from every unit
The code most landlords and property managers start with. One tag per unit, and every request arrives already knowing where it came from.
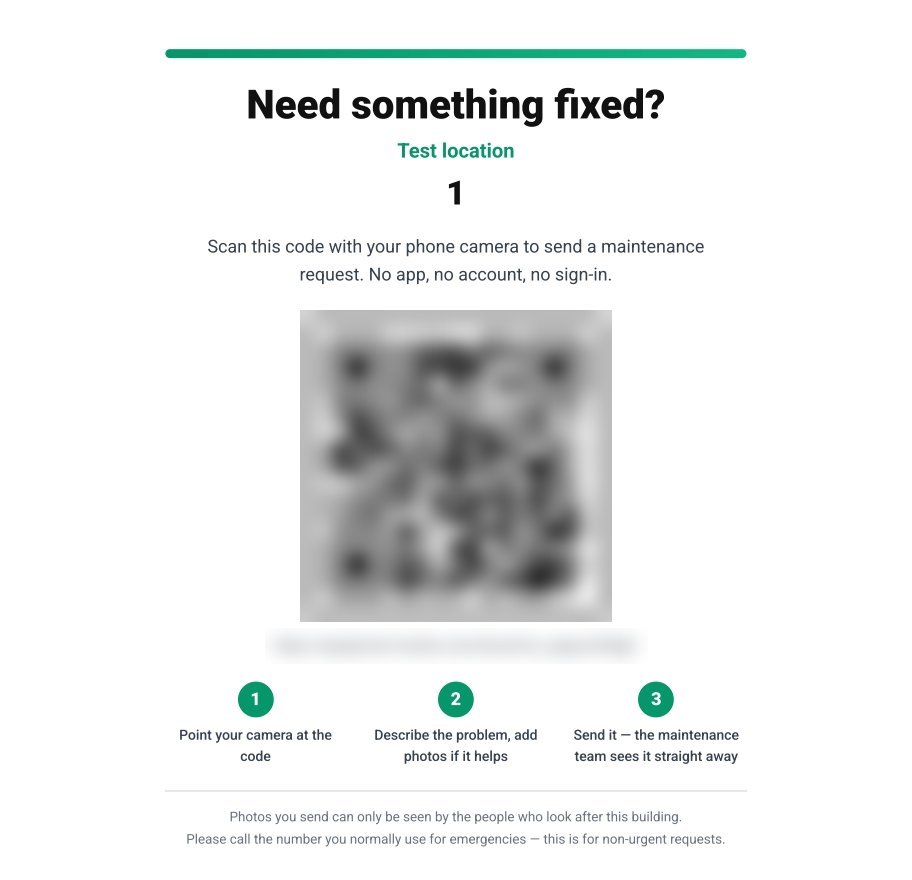
Tenant door tags, one for each unit
Needs Pro
Put one inside every door and repair requests stop arriving by text, voicemail and hallway conversation. Each one comes in with the unit, the tenant’s words and photos, ready to turn into a work order.
What it is, and what a scan shows
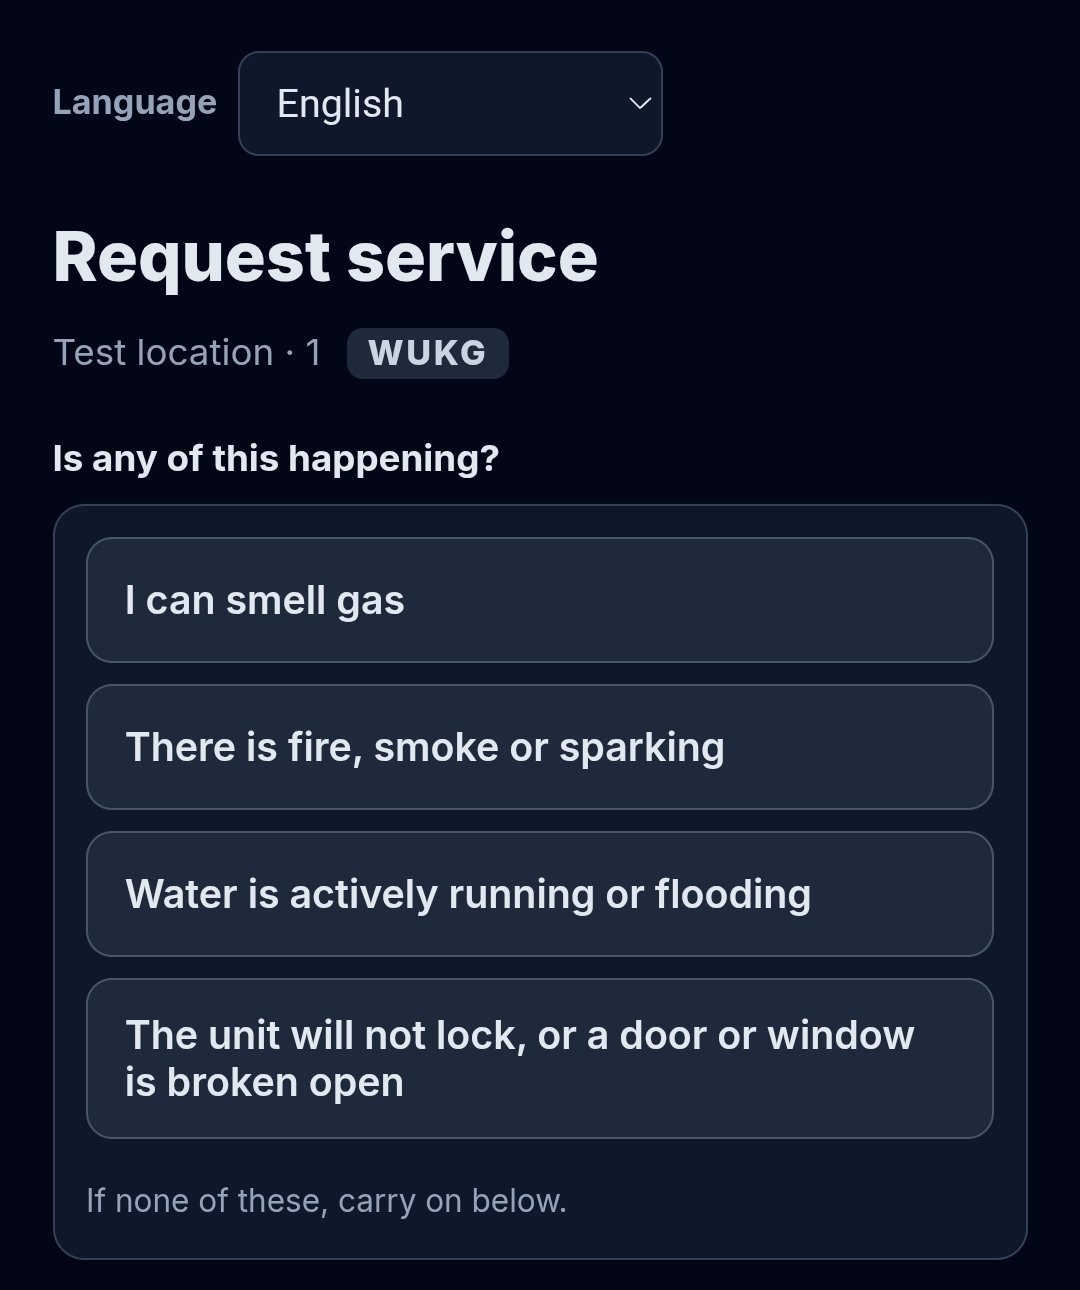
A QR tag for one unit. A tenant scans it with the phone camera and gets a Request service page for that unit: no app, no account and no unit number to type.
Four safety questions come before the form: gas, fire or sparking, water running or flooding, and a unit that will not lock. Any of them replaces the form with what to do and a number to call. Otherwise the tenant says what is wrong, adds up to 3 photos and sends it.
The page shows the building, the unit and a short verify code that is printed on the tag too, your office contact and emergency number, and whatever you add to the tenant information: shutoffs, fire safety, utilities, notices and document links. It never shows the tenant’s name, phone or email.
The request reaches your phone, and the building’s tenant alert list gets an email or a text. If you switch on rent from the tag, the tag also shows a Pay rent button while the unit has an open rent bill, and nothing about the bill appears until the tenant types the email or phone number you have on file.
When to use it
For every apartment, suite or rental house you want repair requests from. A single rental house is one unit.
Replace a tag when a card goes missing or a unit turns over. The old code stops working straight away.
Where to put it
Inside the unit, on the back of the front door or beside it, where the tenant sees it every day. Or hand it over with the keys at move-in.
The letter-size door tag is made for a door or a notice board. The smaller labels suit a door frame or the side of a panel.
In the app
Open the location, tap Site Info, open UNITS, TENANTS & RENT and tap TENANTS & DOOR TAGS. Tap a unit, then CREATE THE DOOR TAG.
PRINT DOOR TAG (PDF) prints the letter-size tag. MAKE A STICKER LABEL opens the QR Creator for label sizes from 1 by 1 inch up to 4 by 6. On the unit list, CREATE MISSING TAGS makes every tag you have not made yet and PRINT ALL TAGS prints them all at once.
REPLACE THIS TAG makes a new code and retires the old one. SEE WHAT A SCAN SHOWS opens the page your tenant will see.
A tag cannot be printed until the building’s tenant alert list has an email or a text number. The app says so and offers GO TO THE TENANT ALERT LIST.
On the web dashboard
Open the location, click Site Info, open UNITS, TENANTS & RENT and click TENANTS & DOOR TAGS. Pick a unit, then Create the door tag.
Print the tag gives you a letter-size door tag or a 4 × 6, 4 × 2 or 2 × 2 label. Open in the label designer takes it to the QR Code Generator. Replace retires the old code, and See what a scan shows opens the tenant’s page.
The older building-wide request code
Needs Pro
Only if you already have one up.
What it is, and what a scan shows
Before door tags, one code served a whole location. It opens the same Request service page with the same safety questions, but the tenant types the unit, there is no verify code and there is no Pay rent button.
The app no longer prints new ones. Codes already on a wall keep sending requests, and the location page’s Request Service button leads to the same page.
When to use it
If you already have one up, it can stay. For anything new, print a door tag for each unit, which already knows the unit.
Where to put it
Where it already hangs: a lobby, a laundry room or a notice board.
In the app
Nothing to print. TURN ON TENANT ALERTS, under UNITS, TENANTS & RENT in Site Info, switches the location’s tenant requests on, and requests from this code arrive with the door tag requests.
On the web dashboard
In Site Info, the line Tenant request page: shows this page’s address, and Turn on tenant alerts switches it on.
Tag your first building this week
Door tags are part of Pro, with no per-unit fees: the same price for 12 units or 1,200. Every plan starts with a 7-day free trial for first-time subscribers.
Vendor sign-in at the door
Vendor sign-in door sign
Needs Pro
Know which contractor was in the building, when, and what they came to do, without a paper sheet on a clipboard.
What it is, and what a scan shows
A sign for the building door or the mechanical room. A plumber, an electrician or a service tech scans it, chooses Checking In or Checking Out, and types a name, a company and the reason for the visit. No app and no account.
You get an email as they arrive, and a text to confirmed numbers, with the area named. When they leave they scan again, their sign-out is matched to that day’s sign-in by name, and they can say what they did.
Every visit goes into a vendor log you can open from the app, the dashboard or the email. The page can show the site’s contact, so a visitor knows who to call, and the sign prints any message you write for vendors. Anyone who scans the sign can read both, so never put a gate code in that message.
When to use it
For any building where outside trades come and go: apartment buildings, offices, schools, clinics, plant rooms. You want to know who was in the building, when, and why, without a clipboard.
Where to put it
Inside the main entrance, on the mechanical, boiler or electrical room door, or at the roof hatch. Type an area, such as Boiler room, to print a sign for that area.
In the app
Open the location, tap Site Info and open VENDOR CHECK-IN. GENERATE & PRINT DOOR SIGN makes the code and prints the letter-size sign; after that the button reads PRINT DOOR SIGN (LETTER). CREATE QR LABEL / CODE makes a sticker label in the QR Creator instead.
VIEW CHECK-IN LOG opens the log. VENDOR CHECK-IN — NOTIFY EMAILS and the phone list below it set who hears about arrivals, and DOOR SIGN — CUSTOM MESSAGE sets the message printed on the sign.
On the web dashboard
Open the location, click Site Info and open Vendor Check-In. Generate Check-In QR & Door Sheet makes the code. Print Door Sign prints the letter sign, Print QR Label prints a door tag or a 4 × 6, 4 × 2 or 2 × 2 label, and Manage Vendor Log opens the log. Notify Emails and Notify Phones (SMS) set who hears about arrivals.
The equipment in your buildings
Live QR tags on equipment
The live web page needs Pro. Text and JSON codes are free.
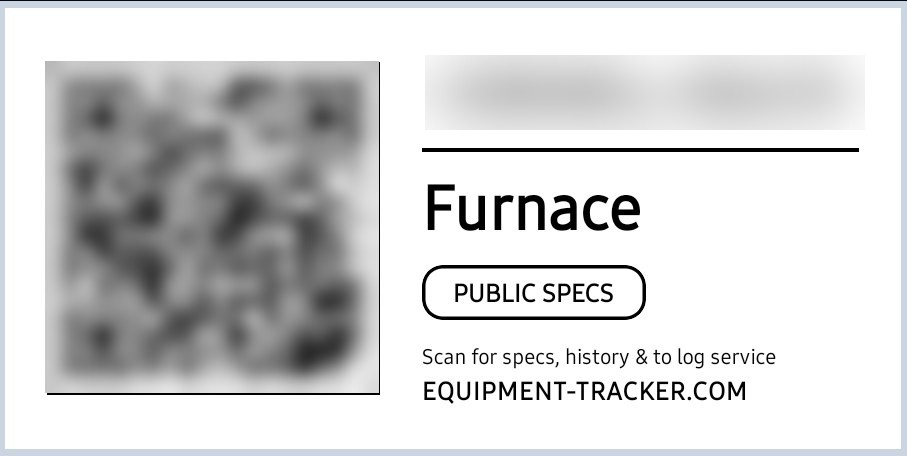
Tag the furnace, the water heater and the rooftop unit, and every contractor who works on them sees what was done before and can log what they did, without your login.
What it is, and what a scan shows
A label on the unit that opens its own web page: the specs, the installed parts, the spares on hand, notes, the maintenance coming up and the service history. Anyone who scans it with a phone camera sees it, with no app and no login. Costs, labor rates and invoices are never on it.
The page stays current. The sticker holds a link, not the data, so a visit you log today appears on a tag you printed last year.
A visitor can press Log Completed Service to report work they have already done, or Request Service to report a problem. It comes to your inbox to accept or to turn into a work order, and an accepted report goes into the unit’s history. If the location has a vendor sign-in code, the page has a Vendor Check-In button too.
You choose, for each location, whether a scan shows what is coming up, the service history and the Request Service button, and whether the site address and contact appear.
When to use it
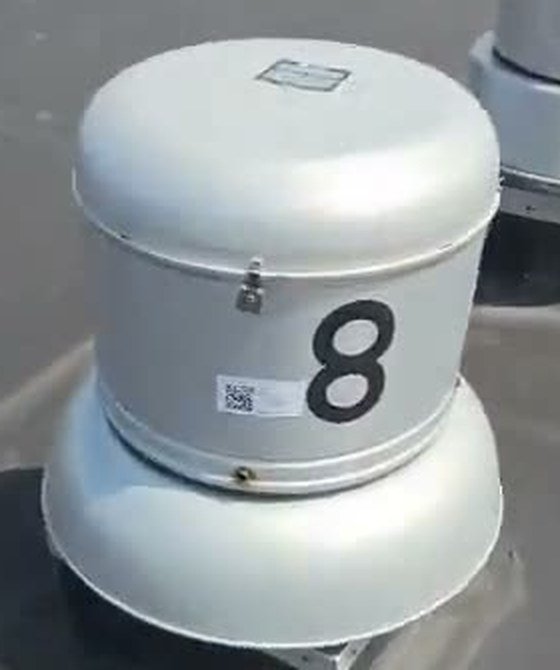
On anything that gets serviced more than once, or that someone else might service: rooftop units, furnaces, boilers, water heaters, chillers, exhaust fans, walk-in coolers. It is how the next tech, or a contractor you have never met, finds the model, the filter size and the last visit.
Where to put it
On the unit itself, near the nameplate or on the service panel door, where a tech opening the unit will see it. Keep it off hot surfaces, and use a weatherproof label outdoors.
In the app
Open the equipment and tap the QR CODE tile (Print a label). The QR CREATOR opens: choose WEB LINK, pick a Label Size from 1 by 1 inch up to 4 by 6, then SAVE PDF or SHARE QR PDF to print. A Custom QR Message is shown at the top of the page.
SEE WHAT A SCAN SHOWS, under the preview, opens the page. Reports from visitors arrive under INBOX, on the Guests tab, with Approve and Work Order.
What a scan shows is set for each location in Site Info, under QR CODES & PUBLIC PAGES: Show what is coming up, Show service history and Show the Request Service button. Show site info on QR codes, at the top of Site Info, controls the address and contact.
On the web dashboard
Open the equipment and click Print Tag, open a location and click Print Tags to tag every unit there, or open QR Tags from the More menu. In the QR Code Generator choose Link, pick the Tag Physical Dimensions and click Print Selected Labels.
Visitor reports arrive under Inbox, on the GUESTS tab, with APPROVE & LOG and CREATE WORK ORDER. The page switches are in the location’s Site Info, under QR CODES & PUBLIC PAGES.
The location page
Needs Pro, with Cloud Backup turned on
One code for a whole rental house or a small building.
What it is, and what a scan shows
One code for a whole house or building. It opens a page listing the equipment there, each unit linking to its own page, with what is coming up and the recent service across the location, and a year calendar for any maintenance agreement the customer has accepted.
If the location takes tenant requests, the page has a Request Service button. Visit reports you chose to share are listed on it.
When to use it
For a house or a small building where one code at the door is easier than a tag on every unit, and to give a homeowner or a building manager one place for everything.
Where to put it
By the main electrical panel, in the utility room, on the mechanical room door or inside the front door of a house.
In the app
Open the location and tap its share icon, then Send to User, then the QR CODE button at the bottom. Choose WEB LINK.
On the web dashboard
Made in the app, not on the dashboard. The switches for what it shows are the same ones, in the location’s Site Info under QR CODES & PUBLIC PAGES.
Getting paid
Pay-by-QR on invoices
Invoices are free. PayPal and Venmo codes work on any plan. The invoice’s web page and card or bank payments need Pro.
For the bills you send, such as a repair you charge back. Rent itself is paid from the tenant’s own door tag, above.
What it is, and what a scan shows
SHOW TO CUSTOMER fills your screen with a code the customer scans with their own phone. SHOW INVOICE opens the invoice’s web page with every way to pay you have switched on. PAY WITH PAYPAL and PAY WITH VENMO take the customer to PayPal or Venmo with the amount filled in.
The invoice PDF carries the same codes: Scan to pay online, Scan to pay with PayPal and Scan to pay with Venmo.
Card and bank payments go into your own Stripe account and mark the invoice paid by themselves. PayPal and Venmo payments go straight to you, and you record them with RECORD PAYMENT.
When to use it
At the end of a job, with the customer standing there, or on the invoice you email or hand over.
Where to put it
On your phone’s screen, and on the printed or emailed invoice. Nothing to stick up.
In the app
Open the invoice and tap SHOW TO CUSTOMER. It is there once the invoice is issued and still owed. The ways to pay are set up in Settings, Company Profile.
On the web dashboard
On the Invoices page, open the invoice and click SHOW TO CUSTOMER. OPEN THE PAY PAGE opens the same page on your screen.
Codes that need no internet
Text and JSON codes, no internet needed
Free on every plan
Useful in a basement boiler room with no signal, or for a code that should never lead to a web page.
What it is, and what a scan shows
A text code prints the details on the sticker itself: the unit, the location and contact, the make, model, serial, filter and belt sizes and notes, whichever you choose. Any phone camera shows them as plain text, with no app, no signal and no website.
A JSON code carries the same record for another copy of the app. Scanned with the app’s own scanner, it offers to import the equipment into that person’s account.
Neither one changes after it is printed. To show a new visit or a new filter size, print a new one. That is the difference from a live code.
When to use it
Where there is no signal, such as a basement plant room or a remote site, where you want no web page at all, or on the free plan.
Where to put it
The same places as a live tag: on the unit, the part or the tool.
In the app
In the QR Creator, choose TEXT or JSON instead of WEB LINK, and pick what goes on it under Select Included Fields.
On the web dashboard
In the QR Code Generator, choose Text or JSON, and pick Include Location, Include Specifications and Include Equipment Notes.
Questions
Do my tenants need to download an app?
No. A tenant points the phone camera at the door tag and a web page opens. There is no app to install, no account and no unit number to type.
What does a tenant see, and who sees their details?
The building, the unit, a short verify code, your office contact and emergency number, and whatever you add to the tenant information, such as shutoffs and notices. A tenant’s name, phone and email are never on it.
What if a tenant loses the tag or moves out?
Replace the tag from the unit’s screen, in the app or on the dashboard. The old code stops working straight away, and you print the new one.
Which codes are free?
Text and JSON codes are free on every plan. Live codes, the ones that open a web page, are part of Pro: tenant door tags, the vendor sign-in sign, equipment, part and tool pages and the location page.
What happens to the tags if I stop paying?
The tags stay where they are and the page still opens, but repair requests sent through it stop going through until Pro is back on. You do not need to reprint anything when you start again.
What happens to the stickers if a building changes hands?
The stickers can go with it. The current owner taps TRANSFER at the top of the location and gets a 6-character code. The new owner enters it in Settings, then QR Codes & Stickers, then Take over a location’s QR codes (on the web dashboard: Account Settings, QR CODES & STICKERS, then Enter a code), and the location moves to their account with everything on it. Its stickers then open their records. Both sides need Pro.
Can the codes carry my own company’s web address?
On a Team plan, yes: your live codes can use a web address your company owns, like tags.yourcompany.com, and you can download a copy of every sticker page. See Your data and stickers.
Read next
Start with one building
Download the app, add a building and its units, and print the first door tag. Every plan starts with a 7-day free trial for first-time subscribers.